Restoring an Antique Trunk and For Young Women a Lesson in Man-Speak


Recognizing treasure when you find it
Over the holidays, deep in my father’s dusty cellar, my niece found a beaten old-style travel trunk that had probably once belonged to my grandparents. Except for it being dirty, rotten, rusted, and falling apart, she absolutely loved it. In anticipation of her first post-college apartment, she wanted it badly - except it was dirty, rotten, rusted, and falling apart. She came up to the kitchen all excited about it, and then, tugging on my arm, she pulled me downstairs. “Unckie Monkie, I have a GREAT idea . . .” My spidey-sense, my sounds-like-work-for-me sense, started tingling: I’m sure all the uncles out there know what I mean!
The trunk was kind of cool. She didn’t want it repaired to the point of looking new: she wanted a clean, solid version of the beaten-up trunk her great-grandparents had used. The decorating style is called “shabby chic.” Ya, I could see it, imagine the trunk cleaned up and in an urban apartment, maybe on a hardwood floor against a dull-red brick wall. Maybe on top of it would be a couple of girly candles, a small party platter of hors d'oeuvres and opened bottles of wine, young people standing around, dressed in new clothes and talking excitedly about all they were beginning to do with their lives . . . Ya, it would be kind of cool.


Is it salvageable?
DeeDee asked me only how she could fix it up. She fully intended to do the work over spring break. And then we managed to open the trunk lid. I saw the change in her face. No way, no matter how much scrubbing was done, was she going to put any of her clothes or blankets or possessions of any kind in there! “Maybe not . . .” she said, quietly.


“Well, wait a minute,” I said. “Maybe we could take all this out, rebuild this rotten wood part, and then . . .” I glanced up at her and saw the faint beginnings of her familiar, sweet smile.
“Will you teach me how to do all that? With the wood?” She may be a budding fashionista, but she’s also a DIY gal. A great idea, except her college break schedule and us living more than a few miles apart would make it hard to tackle a not-so-small project. I suggested that she focus on finishing school, I’d restore the trunk for her, and maybe before she left home to begin her career, we'd do some DIY project together.


Exactly what do we have to work with?
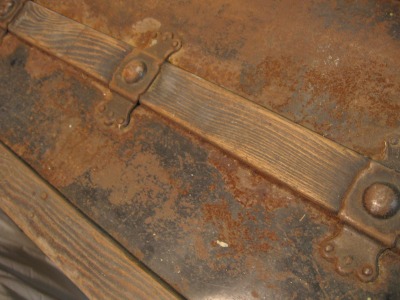
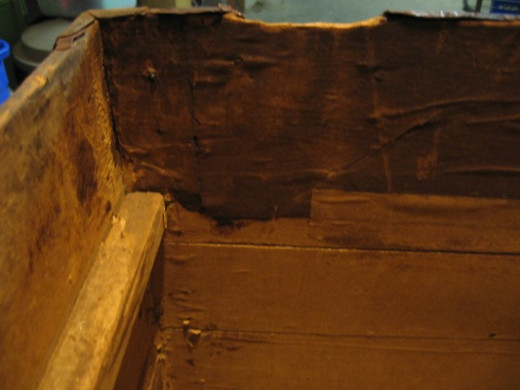
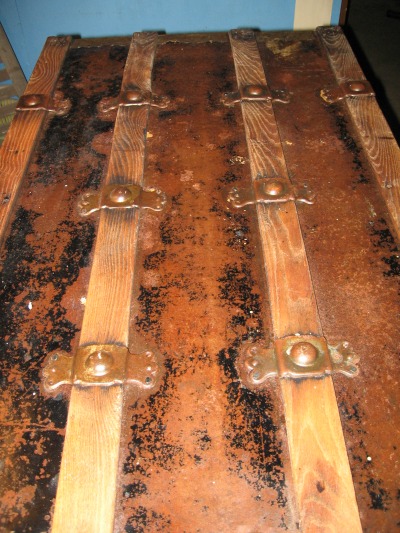
I worked on it in my father’s basement. The first step was to remove all the wood that was rotten, which I soon discovered meant all the wood, period. The outside was sheathed in thin, painted metal that was splotched with rust and in some places holed or torn. The inside was papered (like wallpaper), as was common in “the old days.” In between the cheap sheet metal and the cheap wallpaper was cheap pine wood, stained by mildew and rotted enough to weaken the structure (tested by touch) but not enough to make it collapse on itself. No, this never had been a quality piece of furniture. Even if it had been in great condition, as an antique it wouldn’t have been, couldn’t have been worth anything. No, this was nothing at all like a well-crafted steamer trunk: this had been a working-class immigrant’s trunk. It was about a hundred years old, and it showed its age. Which is why DeeDee loved it. (Which is also, she teased PapPap, why she loved him.)

BEFORE you take it all apart
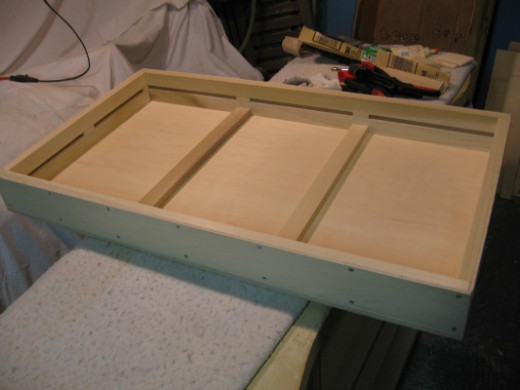
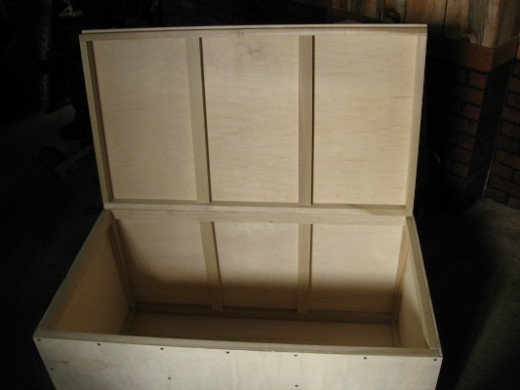
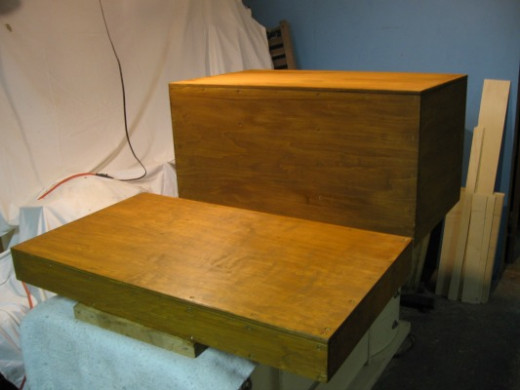
The second step was rebuild the wooden box that had supported the exterior sheet metal pieces. I had taken a bunch of measurements of the box before I had destroyed I mean dissembled it, and I re-learned one more time that when doing something like this you can never take enough measurements beforehand. Nope, you’ll always get to the point where you say, “Wait a minute? How many inches is it supposed to be from this to that?” Suggestion #1: Measure things, draw diagrams, take the infamous “27 8x10 color glossy photographs with circles and arrows on the front and a paragraph on the back of each one explaining what each one was . . .” It is not a bad idea to take plenty of close-up digital pics of how things fit together.
Inaccurate expectations: a sneaky source of frustration
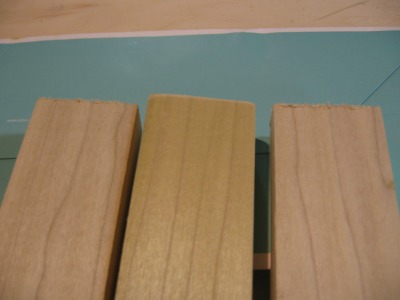
Instead of replacing the original somewhat-rough-cut pine with the same, I used aspen plywood and poplar bracing. Of course, available thicknesses were not the same, which was my fault. No, it was not because I had let about 100 years go by in the wood supply industry and was probably rebuilding it on a different continent. Yes, it certainly was because I jinxed myself when I had told my niece that replacing the wood would be easy-peasy, zip-zap-zowie. Suggestion #2: Don’t jinx yourself by expecting everything to be as simple and straightforward as it first looks. (This is another one of those things I find myself re-learning one more time . . . )
Put a little "give a damn" on it
Suggestion #3: Make all of your wood cuts just barely on the outside of your (kinda sharp) pencil line. Reason: so you can lightly sand them to a perfect, snug, clean fit. (Note: unless you’re putting together something that won’t be seen – like 2x4 framing inside a sheetrocked wall – please clean up your saw cuts! When I see uncleaned cuts, even on things like deck railings, the same word always jumps into my mind: Sloppy!)


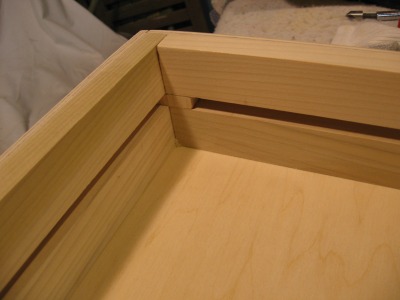
Perfect is the Enemy of Good
Suggestion #4: Don’t worry about making everything perfect, but make each piece as well as you can. Unless you’re an absolute craftsman, no project ever comes out as perfectly as you initially envision the final product. Don’t worry about it. You will always be able to point out a defect in your work here on the back side and there on the bottom, but if other people look at it, maybe even inspect it carefully, and pronounce you’ve done a fine job, well, then yes, you have done a fine job! Also, just like the baseboard at the bottom of your walls, there’s a reason for trim: it covers less-than-perfect joints. But, remember that if you allow a little sloppiness here and little there, cumulatively you’ll end up with . . . a sloppy disappointment. Work carefully but not obsessively. (The devil is in the details, but so is the love.)
Note: do not assume that wood you buy is cut perfectly square. 89 degrees is not 90 degrees, and for a lot of things it doesn’t matter, but when you’re doing something like making a lid for box, if the bottom of the box isn’t 90 degrees, it just might twist the whole thing off, amplifying the 1 degree difference over the height of the box.


A tenet of Physics
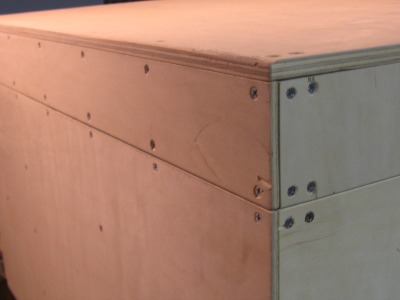
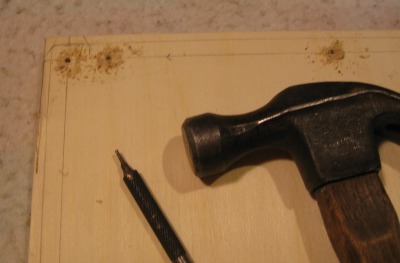
To put the whole thing together, I used screws because they hold better than small nails. They’re definitely more work to place, but the result is more uniform and solid. Suggestion #5: Learn to countersink your screws. After you drill a pilot hole (slightly smaller than the thickness of your screw shaft because two things can’t occupy the same space at the same time), use a countersink bit to dig out an angled “hole” for the top of the screw to sit in. Do it by hand so you don’t dig through the wood to China. (The countersink bit will fit in the handle of multi-bit screwdriver or nutdriver.)


Making it "purt-ems"!
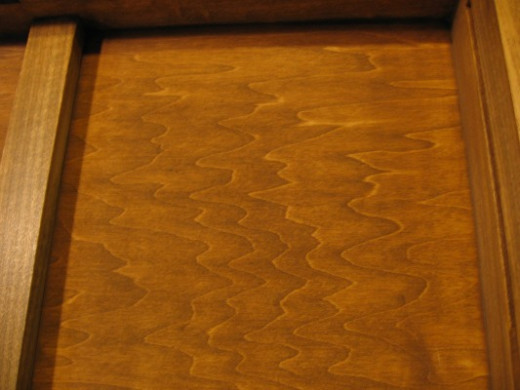
After I built the box, I stained its outside because it would show through the couple of holes and tears in the sheet metal covering, and maybe someday my niece would remove the old sheet metal to use the trunk for a toy box or something. Besides, I had to treat the inside wood with something, and you can paint over wood stain but you can’t stain over paint. Suggestion #6:When you stain wood, do one surface at a time. Have a few clean, soft, lint-free rags ready, and as soon as you have a surfaced covered evenly (work quickly!), wipe it off. And watch for dripping over the edges; prevent it if you can.


Cleaning and protecting aged components
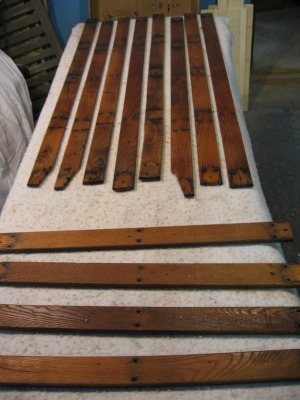
Next, with a brush and a TSP solution (Tri-Sodium-Phosphate, available at your local hardware store) I cleaned the loose rust from the sheet metal pieces and fittings, then sprayed them with a clear polyurethane (matte finish) to keep them from decaying further. The finish would also enable people to touch the trunk without getting rust-stained hands, which was important since it was to be used as “shabby chic” furniture.
I did the same with all the oak slats, metal fittings and corner pieces. My father got in to the act here, pretending to dry the hardware so he could claim that he had to show me how to do everything and that he had wound up doing most of the work.


Reconstruction!
I reattached all the sheet metal pieces, using cut tacks (they’re squared off, not round shafts like wire nails). Replacing the metal pieces was much harder than I thought it would be because it was in many more pieces than it had appeared to be before I took it all apart. I thought there would be one piece of metal for each side of the box, all sides held in place by two oak slats, but no-o-o, there was one piece of metal per area between oak slats. See Suggestions #2 and #4.


Finishing touches
Lastly, I installed two pieces of white “spun” nylon 3-strand rope to hold the lid from falling open, which stressed the old sheet-metal hinges and pulled on all the screws and tacks. However, even with fender washers to hold screws through the rope, it didn’t want to stay where I put it. I was disappointed because the “spun” nylon was soft to the touch and wouldn’t bother any clothing or blankets my niece might put inside. See Suggestions #2. Instead, I installed some light chain to do the job.
Out of curiousity . . .
If you're a woman, how much Man-Speak do you believe you know?
A Lesson for Young Women in Man-Talk or Man-Speak
I am sure my niece already understands this (she does things like come outside in the summer heat to watch me work on her car, not so she can learn how but partly so she can understand what I’m doing and mostly to show her appreciation for me doing it), so this is for the benefit of other young women out there. Without going in to stories about certain 20-, 30-, and 40-something year-old women I’ve known, believe me, I guarantee that not every woman is even aware of some common clues of how men communicate.
When a man rebuilds an old trunk for you, or works on your townhouse deck, fixes your car, or whatever . . . when a man does something for you, he is telling you something. Yes, a woman should find a man who uses words to say how he feels (the “strong, silent type” is a bit of an oxymoron, and why should a woman date any kind of moron?) What a man does for you, though, for you, is a really big clue about what’s going on inside him. Show him you recognize that and often his words will then come out comfortably.
Instead of rebuilding this old trunk for my niece, I could have taken my time, energy, and even the dollars it took, and put it all elsewhere. I could have worked on a project for my boat, or – if the mood struck me – I could have sat somewhere and watched some paint dry. But I rebuilt the trunk for her because it is one of the ways I can tell her, “I love you.” And years from now, decades from now, no doubt after this trunk has gone through several refurbishments and repurposings and coats of paint, maybe one day she’ll find it buried in the back of her basement, and in her heart she’ll still be able to hear me say the words, “I love you.” All you young women out there who don’t know any better, that’s man-speak.